For this post I thought I’d share a set of exercises that I came up with to help my students develop finger strength and fine-tune their string bending. It’s fun, challenging and might just open your mind to new possibilities in how to approach a solo melody. If anything, it will definitely help toughen up your calluses!
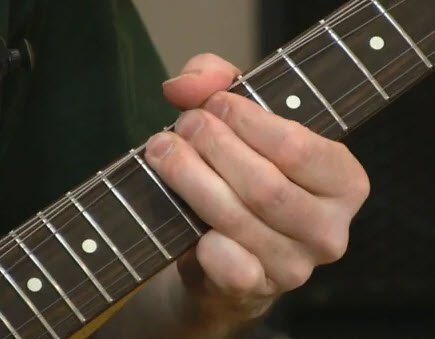
All of my examples make use of the A “Natural” Minor Scale in the 12th fret position. Feel free to move the entire pattern to wherever you feel most comfy on the neck, but less strength is required to bend in the 12th fret area. Try to use all of your fingers, assigning each one to its own fret. Your 4th finger should be used to play the notes on the 15th fret.
(Just a note: You can zoom your screen to make the examples larger, or right-click and choose “Open Image In New Tab” if you like.)
Time to grab that guitar. Begin by playing the scale ascending and descending as many times as it takes for you to become very familiar with the melody of the A Minor Scale, shown in Example A (below), which is very commonly used. Don’t stress over how to pick this – use whatever works. The most important thing you can do is LISTEN.

In Example B you first play a “target note” to give you the sound of the pitch you must bend to. After playing the target pitch, bend the string to that pitch from the scale note below it. If you can, use your
other fingers that are behind the one that is doing the bend to add some strength and help with the push – this is called reinforcing a bend. For example, if you are bending with your 2nd finger, your 1st finger should also be pushing the string. As a general rule, I bend strings toward the side of the fretboard where I have the most room, so all of the bends in these examples should be toward the 6th string.

Example C is a lot of fun. Here you will play the entire scale using only bends from the scale note below, and without the target pitch to guide your ear. Play the exercise both ascending and descending.

Example D shows another approach to playing the scale. Here, every other note of the scale is sounded by bending up to it from its lower neighbor. Be sure to give the note you begin on one beat of time
before bending up to the next note. Play the first note, wait a beat, then bend it to the second note and hold that for one beat; next play the 3rd note (wait), then bend it to the 4th (wait), and so on.

In Example E you get to show off your bending skills, using a pre-bent note first and then releasing that pre-bend to the note below it. You should NOT hear the sound of the string bending up to the first note! With a pre-bend you must silently bend the string to what you think will sound the correct pitch, and hope for the best. Tricky.

Finally, Example F requires you to pre-bend to every note of the scale from the note below it. Play the scale ascending and descending.

If you’ve made it this far, congratulate yourself. Bending accurately is NOT easy, but it must be mastered if you wish to be an expressive soloist.
I hope you’ve enjoyed this post – if you did, please share it with others.
Let that be a lesson to you. ![]()
© 2014 Matthew Woodward