Tag Archives: scales

I Want You To Feel Welcome.

THANK YOU for visiting my teaching webpage. I hope you will find all of the information you need. I would love to help you learn to play acoustic or electric guitar, or perhaps provide you with some coaching that will improve your skills and technique.

Over many years of performing, teaching and playing in many different styles I have developed a structured method of coaching that will – in a very short time – reward you with the skills and confidence needed to become a self-sufficient player, able to make music with and for others.

Matthew performing with Wally High and the Non-Prophets, CD release 2007.

I work with a wide range of musicians-in-training across Canada and the USA, on both acoustic and electric guitar, from complete beginners to those performing and teaching at the professional level.

Please share my site with others, it means a lot to me!

© 2023 Matthew Woodward

Practice, Rehearsal and Performance Are Three Different Things, Part I

PRACTICE

This refers to the hours we spend alone with our instrument, working with and attempting to master the technical aspects of what we do. In reference to the need for isolation, players call this personal quality time “woodshedding” or simply “shedding”.  woodshedIt includes the hours we spend reading about music theory, trying to make sense of it all. Listening to players we hope to emulate, and trying to “lift” (learn by ear) their ideas from recordings also falls into this category. If you study with a good instructor they will point out your problem areas that need attention and give you advice on how to remedy them. Listen carefully and put their suggestions into PRACTICE.

japanese scalesPractice involves learning new scales and chords, and pushing the envelope to find ways to keep your playing experience fresh. It means broadening your palette by learning songs in styles other than your usual repertoire. If you’re a hard rock player, learn some funk, R&B, country or jazz standards. Try to keep an open mind. Challenge is good and keeps you and your playing from falling into a rut.

Over the years many students have asked me about how often and for how long they should practice. It’s always been a tough one to answer, because I’ve never had to force myself to be with my guitars. The_Old_Guitar_Player_1903When I was young I was absolutely driven to play and spent hours trying to figure out the songs I thought were “hip”. The question had more to do with how to get the guitar OUT of my hands so as to make me do other more mundane things like school work!

My own personal relationship with my instrument is like that with an old and true friend. Sometimes we drift apart, but when we get back together we pick up the thread from where we left off. The time apart often does our friendship good. Today, with over thirty years of playing under my belt, I tend to practice on more of a “when I need to” basis. When I have a gig coming up, or if the fancy strikes me to learn some cool jazz riff, or some interesting tuning, an idea for a song – well…sometimes I don’t come up for air for days. If you are realistic and honest with yourself about your skills and technique you will know what needs to be done to improve.

Rather than playing the entire song, a practicing musician will focus on the aspects of that song that they find difficult to play. This might mean going over the G to C chord change in a country song a millionCowboy G times until it’s down, or jamming in the Dorian mode over a pre-recorded play-along track for hours until they’re comfortable with using that scale to improvise.

Practice prepares a musician for rehearsal.

Let that be a lesson to you. 😉

If you liked it, please feel free to share my post with others.

© 2014 Matthew Woodward


Practice, Rehearsal and Performance Are Three Different Things, Part II

How To Rip It Up The Right Way!

What we generally refer to as “lead” guitar, or soloing, is when a guitarist builds melodies using single notes played one at a time in succession, rather than using chords. Whether or not the player is aware of it, the source of these notes will be a scale comprised of the batch of notes that the player feels is most suitable to the chord progression they are playing “over”, according to their own personal taste as to what sounds “right”.

It’s useful to think of how different people speak in order to understand the choices players make in various situations. Each note one plays can be thought of as a single word. Words can be used to build sentences (melodies), sentences to build paragraphs (entire solos), and so on. What a player chooses to say in any given musical situation will usually reflect their familiarity with that situation, their previous experience with other similar situations, or their complete lack of understanding of what is going on musically.

Each musical style has its own dialect, and some words, although they can be found in the dictionary, may be inappropriate for a particular style. Playing jazz licks in a hard rock tune might sound awkward, even if those jazz licks make sense in another song where that level of sophistication is called for. That said, it’s still fine to “mash-up” differing genres, as long as some thought has gone into how to go about it. Finding the right words to say at the right time is the goal of every lead guitarist.

The melodic choices that a player makes will reflect their level of experience and education, in other words, their musical vocabulary. That being said, it doesn’t necessarily follow that a lead player must have an extensive vocabulary in order to be considered good, if they play what they do know well. There are no clear-cut rules as to how to craft a “good” solo. Extremely sloppy solos have been considered legendary, despite their flaws, due to the feeling and emotion that went into the performance. Many well thought-out and technically mind-boggling solos have proven to be just plain boring!

Many players improvise their solos, allowing the notes to flow from their fingers in a stream-of-consciousness sort of fashion. They never play the same thing twice. Others are uncomfortable doing this, and prefer to carefully compose the melody of a solo beforehand. Either approach can work for the soloist as they try to create an interesting musical interlude that both supports and enhances the song. And THAT’S an important thing to always consider – does that great solo you just played actually improve the song?

Many things are involved in the production of the final sounds we hear within a solo, and the mood they are meant to create. One can “speak” with a clean tone, or with a distorted voice. Studio “session players” are often musical chameleons, carrying an arsenal of different guitars, amps and effects in the hope of providing a producer with whatever sounds they may be after. There is almost an infinite number of guitar and amp choices available to modern electric players, even before considering electronic processors such as effects pedals. Finding your sound – the combination that speaks to you is extremely important. You want to be inspired to play.

A trap that many guitarists fall into has to do with the physical layout of the notes we play on the fretboard. Since every scale can be found in some form of recognizable fingering pattern, players will often wander up and down through a pattern (or “box” as they are sometimes called) without really having an idea of what they want to say – they let the pattern they are playing in shape the music they make. It’s rather like forming a sentence by picking words at random from a dictionary.

We have all known people that talk and talk endlessly, never seeming to make a point – they ramble on. Other folks are able to sum up complicated ideas with a few simple, memorable words. They only speak when they have something worth saying. A player’s personality is often indicated by the manner in which they take a solo. Groups of musicians can also be thought of as being engaged in conversation – sometimes everyone is talking loudly all at once, sometimes folks respectfully listen, quietly support or add constructively to what the others have to say.

Good lead players try to form distinct, stand-alone melodies, and they choose their notes with care. The best lead players give their listeners something accessible, often singable, and definitely memorable. People leave the show humming the solos they played.

Aim for that.

Remember: Just because you can yodel doesn’t mean you should always be yodeling.

Let that be a lesson to you.  ;)

© 2014 Matthew Woodward

What The Heck ARE Chords and Arpeggios?

Chords and Arpeggios?

Good question.

I hope you’re seated comfortably, because ramping up to the answer of this question takes a fair bit of preparation.

The word harmony, as used by normal people in everyday speech, usually suggests a good relationship between people, things, or whatever. For example, “the tribes are living in harmony”, or “a harmony of flavors.”hotdogFor us (not-so-normal) musicians, the concept of harmony is a wee bit strange. To us, a harmony happens when we choose any two different musical notes and play them together (at the same time). The strange part is that the combination of notes you choose may sound beautiful, OR extremely unpleasant, and BOTH results are called harmonies. Nice sounding combinations are called consonant harmonies, or consonances (see Example A, below). Notes that don’t mix well together are called dissonant harmonies, or dissonances (Example B).Example AExample BAll two-note combinations fall somewhere between these two poles, and what sounds good to our ears has a lot to do with the relationships of notes within a cool thing called the Harmonic Overtone Series. (I’ll save discussion of that for a later post.)

Consonance and dissonance play equally important roles in making the music we listen to interesting, through the different tensions and releases of tension by which they cause us to feel things, and to make notes seem to want to move, both in melodies and chord progressions. It’s a yin vs. yang kind of thing. (More on that as well another time.)


Notes behave a lot like people.

If you were able to put two people in a room and secretly observe them through a one-way mirror it likely wouldn’t be that hard for you to judge just how well they got along with each other. They will either want to kill each other, or fall deeply in love, or they’ll be somewhere between those two extremes. It’s usually going to be an easy judgement call for the observer, how well person A combines with person B.two in a roomHarmony gets more complicated when THREE different people are combined. No longer is there just the simple relationship between two people. Now the sound we hear is the result of how persons A and B get along, how persons A and C interact, how B feels about C, and of how all three people act when they are together as (A+B+C).

Nancy and Joan are best buddies. Joan loves Fred. Problem is, Nancy loves Fred, too. Put them in a room together and there will be tension. Poor Fred.  😉triangleImagine the harmonic complications that result from combining four or more notes with each other – it then becomes a lot like trying to keep a rock band together!four fighting

When three or more notes are played together at the same time the resulting harmony is called a CHORD.

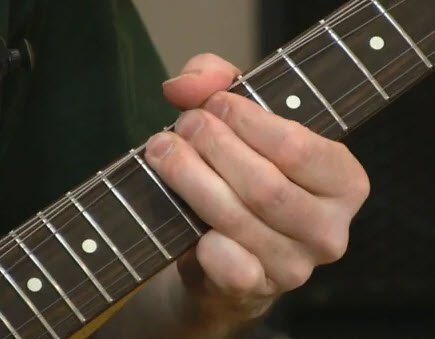
The simplest chords are combinations of three different notes, called Triads. Triads can sound extremely pleasant, or harsh and irritating. The most common triads are the Major Triad and the Minor Triad, both of which are named after the most important note within the grouping. When a chord is called E Major, its name tells us that E is the Root Note and most important note of that Major Triad. The root note is often the lowest-pitched note of the triad. Triads are assumed to be major unless we are told otherwise, so Major Chords are labelled simply with the letter name of the chord’s Root Note . We say, “I’m playing an E chord”.

The lowercase letter “m” is used by musicians to represent the word minor . The note A would be the root of an A Minor triad, and the chord name would be written as Am to tell us that this is not a major chord. See Examples C and D. (Note: Two other triads, named diminished and augmented are also used, but not nearly as often and I’ll discuss those another time. )

Examples C and D

Chords are thought of as being built from musical scales, the most common of which is the Major Scale, with its melody of “do, ra, mi, fa, sol, la, ti, do”. Most everyone has heard this played or sang at some point. Notice how “do” is found at both the beginning and end – this is because the note that ends the Major Scale has the same name as the one which begins it, and is called the octave of the root note. (Just trust me on that for now.)

Instead of using the nonsense syllables found in that little ditty (which are from an educational method called solfège), musicians give each of the notes of the Major Scale a number to describe their positions in the melody. “Do, ra, mi…” becomes 1, 2, 3, 4, 5, 6, 7, 8. Due to the fact that all Major Scales are constructed in the same way, when discussing music theory the C Major Scale (see Example E) is most commonly used, because none of its notes are sharped or flatted. This scale contains only the natural notes C, D, E, F, G, A, B, C. Using numbers, C would be called 1, and B would be called the 7th, and so on.

Should we wish to indicate notes that are diatonic to (within) the scale, but are above the octave, the numbering system simply continues. The D above the octave C would be given the number 9, and the F above the octave would considered the 11th.

Example E

If we imagine a chord to be a cake, the Arpeggio of that chord would be the list of ingredients called for in the recipe of that cake.guitar cake

There you have it, in a nutshell. A good cake recipes usually lists the ingredients in the order in which they will be used, and musicians do the same when describing or practicing Arpeggios. The Major Triad is formed by combining the 1st, 3rd and 5th notes of the Major Scale. It’s formula is described as (1 + 3 + 5). For a C Major chord that translates as a combination of C, E and G. If you play those three notes one at a time in that order you are playing the arpeggio of the C Major chord.


That’s how simple it is.

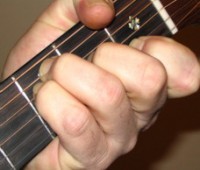
We usually conclude arpeggios with the 8th note, or octave of the scale, to indicate that between the Root and octave, the notes just played (in the arpeggio) are the only notes that are used in the chord. So to play a typical “complete” C Major arpeggio, one would play C, E, G and then the high, octave C to “cap it off”, so to speak. See Examples F and G.Examples F and GThe Minor Triad formula is (1+ b3 + 5), telling us that the note used in the middle of the triad is now to be played a half-step below the 3rd note of the Major Scale. Lowering the 3rd by flatting it brings it closer to the root. The shorter distance now found between those two notes is what we are referring to when we say “minor”. Following the formula, a Cm chord is made up of C, Eb and G. To play the Cm arpeggio we would play C, Eb, G, and end with the high C. This is shown below in Examples H and I.Examples H and IThere are MANY types of chords, each with a different formula describing which notes to put together, and hopefully you can see how learning the Major Scale is essentially to understanding what these formulas tell you. A Major 7th (abbreviated as Amaj7) is a four-note chord, and its formula is (1 + 3 + 5 + 7). C Major 9th has five notes, and a formula of (1 + 3 + 5 + 7 + 9). See Example J.Example J

Why use arpeggios?

Since  arpeggios simply separate the ingredients of our chord cake, every note in an arpeggio for a particular chord will sound appropriate when played over that chord.  It only makes sense that if your friend is strumming an E chord while you play the E Major arpeggio you will be in perfect harmonic agreement with one another. The notes of your arpeggio are all the “safest” notes to play.

It’s important to note that arpeggios can be inverted in the same way that chords can. In a real playing situation you can play the notes of an arpeggio in whatever order you wish – you don’t always have to start on the root. (If you’re not sure what I mean, check out my post called Inversion Diversion.)

Some folks refer to arpeggios as “broken chords” and, rather than playing a chord, they will substitute the arpeggio in its place. A good example of this is heard in the main riff of Manic Depression by Jimi Hendrix, in which he plays A and G Major arpeggios along with single notes to outline and imply the chords of a progression instead of just strumming them outright. See Example K.Example KWhether they know it or not, arpeggios are used all the time by musicians and can be used to craft the melody of a solo, such as the famous lead guitar part that ends The EaglesHotel California. In the solo of that song, not only is every chord in the progression implied by arpeggios, but those arpeggios are also played in harmony, with each player using different inversions. I’ve transcribed it for you, with the chords shown, below:Hotel 1Hotel 2Hotel 3Hotel 4Scales, harmony, chords and arpeggios, combined with rhythm are the essence of music. And MUSIC is ESSENTIAL.

Let that be a lesson to you. 😉

If you enjoyed this post, please share it with others using the links below. I won’t mind one bit. Your comments, corrections or suggestions for future posts are also most welcome.

 © 2014 Matthew Woodward

Ontario Music Teachers Directory

Pentatonic Scale Exercise : Checking Out Your New Neighborhood

More than anything else, it takes practice to become accurate and speedy within any form of scale.

If you are new to the 5-note Pentatonic Scale, the following exercises will not only help you get better at cleanly picking fast runs, but will also help you gain a better sense of the tonal center of the scale and how far away from it you are. As the title said, I call this approach “Checking Out Your New Neighborhood”. First we’ll begin by exploring the C Major Pentatonic Scale. After that, more examples follow, using the A Minor Pentatonic Scale.

Think of the root of the scale as your “home” (in this case, the tonic or root note C), and the other notes of the scale as destinations both up and down the street from where you live. When you first move to a new home, it’s normal to begin exploring your neighborhood by going just a short distance away from home. As you become familiar with your area you gain the confidence to venture further away.

The exercises below use the C Major Pentatonic Scale in the V (5th fret) position to take you a certain number of notes away from your home, first above, then below, then in both directions. Once you’ve gone the specified distance, you turn around and head for home. By the final exercise you will have learned to play an important pattern for two octaves of the entire scale, both ascending and descending.

The note groupings are circled. Repeat each example many times until you feel comfortable with it, then move on to the next one. Do your best to play these exercises at a constant, unvarying tempo (speed). Alternate picking (down and up) is essential.

C Major Penta Neighborhood exerciseAs promised, the following exercises use the A Minor Pentatonic Scale, the Relative Minor scale to the C Major Pentatonic Scale. Scales that are relative to one another share the same notes in the same order, but have different starting notes (more on this in a later post).  You will see how the overall patterns for both scales are indeed the same. The examples proceed in the same fashion. Good luck!A Minor Penta Neighborhood exerciseLater posts will dig a little deeper into the theory and discuss the nature of these scales and where it is appropriate to use them. For now, this post lets you get your feet wet, learning the patterns you’ll need to play lead with speed.

Let that be a lesson to you. 😉

I hope you’ve enjoyed this post. If you did, please feel free to share it with others…I won’t mind.

© 2014 Matthew Woodward

Music Teachers In Ontario

The Bends!

The Bends

One of the most valuable techniques to learn as a lead guitarist is how to bend a string. Bending a string, by pushing or stretching it from one side of the fretboard to the other, increases the tension on that string, and results in the pitch of that string going higher.

String bends always raise the pitch of a note, with the distance of rise being determined by the amount of force applied to the string by the player. Generally speaking, we cannot raise the pitch of a string much beyond 2 ½ tones, because the fretboard doesn’t allow enough space for more than that.

Glossary of Terms:

The push of the string is called the bend, and the return of the string to its starting point is called the release of the bend.

String bends require a lot of left hand finger strength, and the best way to develop that strength is by…bending strings. Bending is easiest in the 12th fret area – at the middle of a string – and hardest in the 1st fret area where the strings are stiffest. Whenever possible, a player should use the fingers that are behind the one that is on the note being bent to help with the push. This is called reinforcing a bend. This can’t be done when bending with the 1st finger, so bending with it is not easy.

I find it easiest to describe the various types of string bends to my students by having them imagine the shape of the curved line that would result if we were to plot the rise or fall of pitch caused by the bend on a graph, shown over the amount of time elapsed.

Let me explain myself. If a note is played and held for a moment, then bent slowly upwards to a desired pitch, the line would begin flat for however long the beginning note was held; as the bend begins it would curve upwards until arriving at the desired pitch. If, after reaching the top of the bend, the player allows the bend to release slowly back to the original pitch, the curve would also drop down. What results looks almost like a little hill and shows the pitch climbing up one side to the peak and then lowering back down on the other side. See below. bend1The speed of the bend would determine the angle or slope of the curve. A fast bend and release would look like this: bend2We might also choose to extend the time spent at the peak of the bend: bend3This time, after the release of a fast bend, we immediately bend the string back up again without picking it, then release it: bend4Bends, of course, do not need to be released – if you bend a string up to reach a desired pitch, then dampen (silence) the string with your right hand fingers or pick, all the listener will hear is the upward curve of the bend. By silently releasing the string and re-bending you could make a group of upward-bent notes.

bend6One can also silently bend a string up to a point at which they hope it will be at the desired pitch, then pick the string and release it back at whatever speed they wish. This is how you make your guitar cry.  🙁 This technique is officially called pre-bending, but I’ve also heard it referred to as ghost bending. Prebends can also be silently released.prebendBends can have more than one component to them. A bend may rise a whole tone, sustain a while and then rise some more up to an even higher pitch. This makes the curve a little more complicated. With a slow release from the peak of the second bend added, here’s what this would appear as:bend5So, as demonstrated, bends and releases can take many different forms, and there are more beyond what I’ve shown here. By combining these ideas in interesting ways you can come up with some pretty cool ways of expressing yourself as a soloist.

Let that be a lesson to you.  😉

If you enjoyed this post, please share it with others. I won’t mind.

Inversion Diversion

Finding Your Voice

I had the good fortune of playing with a great Kingston alternative rock band called Gaudi Birds during 1995-6. One (okay, several) of our tunes would become long jams on a groove, as our lead singer, Justin Bird, would go into these really cool stream-of-consciousness lyrical improvisations.

I recall how one song often veered off into a simple E–D–A (I–flat 7–IV) mixolydian chord progression, reminiscent of “Gloria” by Van Morrison. For most of the jam, I would just comp on the cowboy chords in the first position. When I sensed that we were approaching the return to our own song I’d break into a descending figure using small 3-note voicings of the three chords, signalling my bandmates that the change was coming.

How I did that is what this post is about. You might, however, need a little  preamble to help you understand.choir

The way in which the notes of a chord are arranged is referred to as the voicing of that chord. Think of your six strings as a little family choir group – daddy sings bass on the big 6th string, little sister sings the high notes on the 1st string. Each of the other four family members fit their own voice ranges in between on the other strings. Some chords we play have all six voices of the choir “singing”. Others may use only three or four while the others remain silent. You are the conductor, deciding who sings what note and when.

When changing from one chord to another we try to do so in such a way that none of the voices within the current chord has to move in an awkward way to get to the note it has to sing in the next chord. Some voices may move up while others move down. We try to avoid large leaps between notes. This careful consideration of how the voices will move is referred to as good voice leading.

Triads, such as the Major Chord have only three different notes to deal with. The standard names employed for close voicings of triads (in which all of the notes of the chord are within the span of one octave) are fairly easy to understand, even if you can’t yet read music:voicings

Shown above are the C Major Scale and the close voicings that are possible for the C Major Triad, which combines the 1st (Root), 3rd, and 5th of the C Major Scale.

If the three notes of the triad are stacked as a chord with the Root as the lowest note, the 5th as the highest and the 3rd between those two, the triad is said to be in Root Position.

To invert something means to put it upside down or in the opposite position, order, or arrangement. If the lowest note of the Root Position triad is replaced with its octave so that the Root is now the highest note of the chord (while the 3rd and 5th remain the same), we have inverted its position relative to the rest of the chord. Hence, the triad that results is said to be in First Inversion.

Inverting the 3rd to its octave, so the triad is in the order of 5th, Root, 3rd, results in what is called the Second Inversion of the triad.

Finally, inverting the 5th to its octave results in an arrangement of Root, 3rd, 5th – a return to Root Position, but with all of the notes now an octave above where we started. From this point, the other inversions will similarly repeat themselves in the same order.

Remember that each of these three arrangements, Root Position, 1st Inversion and 2nd Inversion, are the same chord. Each can be called a C Major chord on its own. These terms are used simply to describe how the notes are stacked in a particular chord voicing.

Now you’ll better understand what I did. Mind you, this is all relatively basic stuff, using root position (1-3-5), 1st inversion (3-5-1) and 2nd inversion (5-1-3) close triad voicings of E, D and A, but it’s a good exercise and also fun to see the many ways one can play the same three chords. If you can’t read, just use the tab shown below each staff.

Since the E and D chords are only a tone away from each other, I played each of them using the same voicing for each measure. Notice how in the first bar both E and D are in root position voicings, while the A is in 1st inversion. Bar two has E and D in 2nd inversion, and the A in root position. Note that I’ve also written this out with each E chord being played twice so the progression will resemble “Gloria”.

voicings 1A

voicings 2avoicings 3a

Guitar players use a lot of big, 6-string chords when playing rhythm, but we really only need the three notes of the triad to form the chord. Voicing the chords in this fashion requires that you think more like a keyboard player. It keeps the chord progression moving and interesting. In my experience I have observed how the better players tend to use smaller chords to get their point across.

Play the exercise and see if you are able to understand the order in which the inversions switch up as the progression descends. Enjoy!

Let that be a lesson to you.  😉

If you enjoyed this post, please share it with others. I won’t mind.


Going On A Bender!

For this post I thought I’d share a set of exercises that I came up with to help my students develop finger strength and fine-tune their string bending. It’s fun, challenging and might just open your mind to new possibilities in how to approach a solo melody. If anything, it will definitely help toughen up your calluses!

All of my examples make use of the A “Natural” Minor Scale in the 12th fret position. Feel free to move the entire pattern to wherever you feel most comfy on the neck, but less strength is required to bend in the 12th fret area. Try to use all of your fingers, assigning each one to its own fret. Your 4th finger should be used to play the notes on the 15th fret.

(Just a note: You can zoom your screen to make the examples larger, or right-click and choose “Open Image In New Tab” if you like.)

Time to grab that guitar. Begin by playing the scale ascending and descending as many times as it takes for you to become very familiar with the melody of the A Minor Scale, shown in Example A (below), which is very commonly used. Don’t stress over how to pick this – use whatever works. The most important thing  you can do is LISTEN.

In Example B you first play a “target note” to give you the sound of the pitch you must bend to. After playing the target pitch, bend the string to that pitch from the scale note below it. If you can, use your
other fingers that are behind the one that is doing the bend to add some strength and help with the push – this is called reinforcing a bend. For example, if you are bending with your 2nd finger, your 1st finger should also be pushing the string. As a general rule, I bend strings toward the side of the fretboard where I have the most room, so all of the bends in these examples should be toward the 6th string.

Example C is a lot of fun. Here you will play the entire scale using only bends from the scale note below, and without the target pitch to guide your ear. Play the exercise both ascending and descending.

Example C

Example D shows another approach to playing the scale. Here, every other note of the scale is sounded by bending up to it from its lower neighbor. Be sure to give the note you begin on one beat of time
before bending up to the next note. Play the first note, wait a beat, then bend it to the second note and hold that for one beat; next play the 3rd note (wait), then bend it to the 4th (wait), and so on. 

Example D

In Example E you get to show off your bending skills, using a pre-bent note first and then releasing that pre-bend to the note below it. You should NOT hear the sound of the string bending up to the first note! With a pre-bend you must silently bend the string to what you think will sound the correct pitch, and hope for the best. Tricky.

Example E

Finally, Example F requires you to pre-bend to every note of the scale from the note below it. Play the scale ascending and descending.

Example F

If you’ve made it this far, congratulate yourself. Bending accurately is NOT easy, but it must be mastered if you wish to be an expressive soloist.

I hope you’ve enjoyed this post – if you did, please share it with others.

Let that be a lesson to you. ;)

© 2014 Matthew Woodward


Playing Guitar Has Its Ups and Downs

In my experience as a guitar instructor I have met two different types of students – those who know which way is up, and those who…well…don’t.

I’m referring to how a guitarist “sees” his or her instrument when viewing it from the playing position. Some players describe locations on their instrument with reference to the room they are in. Others, like myself, take a more musical point of view on things. 

Grab your guitar. See that big 6th string that’s closest to you? It’s also the closest string to the sky, so some people refer to it as the “top string”, and the skinniest string, closest to the floor as their “bottom string”. This way of thinking always messes me up because, for me, the big string is THE BOTTOM STRING and the skinny one is THE TOP STRING. Why? My orientation is not based on the room I’m in, but rather the musical pitches that each of those strings are tuned to. I think in terms of high and low musically. Lie on your back while playing guitar and you’ll see how the first concept fails, while the melodic idea does not. The pitch of the 1st string remains high above that of the 6th.

Our sixth string, tuned to E, sounds the lowest note available to us in standard tuning. I think of that low E as being at the bottom of things, below every other note on the guitar. As we move from the 6th string to the 5th string I think of that as a jump upward, because the 5th string is tuned to a higher pitch than the 6th. The other strings sound consecutively higher pitches, so I consider moving from the 6th string towards the 1st string as going UP across the strings, ie. from the low side to the high side.

Directionally, I always think in terms of pitch. If I’m holding an open E major chord and hit just strings 6, 5 and 4, I have just played the bottom half of the chord. I might just chug away on that low end, occasionally spanking those higher strings on accents. Think of the riff to the T. Rex song “Bang A Gong (Get It On)”.

Now let us consider these concepts of up and down with respect to a single string. Play your open low E (Ha!). As stated, the full-length of the open string sounds the lowest pitch of that string. Now press the string down against the 1st fret and note how the pitch we hear is now higher. By fretting the string you have shortened its length, which causes it to sound out a higher pitch. The shorter the string becomes, the higher the pitch goes, so, if you continue moving to consecutively higher frets you will be heading in the direction that I refer to as “up the neck”. Moving from the area of your headstock towards the body of your guitar is moving upward, and this holds true for all of your strings.

To summarize and take it just a bit farther, we actually end up with TWO ways to go when we wish to change from low notes to high notes: First we had the idea of moving upwards across the fretboard from our 6th string to our 1st; secondly, by shortening any string by fretting notes we can move up the neck. As a result, in a general sense, movement from low to high on the guitar is in a diagonal path that runs from the low open 6th string to the note sounded by using the highest fret available on the 1st string (which varies between instruments).

If I haven’t yet convinced you to change your ways, then consider how musical notes are written on sheet music and tablature staves, where low notes are placed on the lower lines and higher ones on the lines above them. Even if you don’t read, you can see from the example below how the melody of the picking pattern, which moves from low notes to high notes and then back to low, takes the shape of a curve that also moves up and back down as though it climbs up a hill to the top and then comes back down on the other side. On both the music and tablature staves you can see the shape of the melody rising and falling. A single strum across the entire G chord ends the melody. Its notes are stacked, because they are all played at the same time. See where the notes of the chord are found on the staves, relate them to your guitar, and think about high and low.example for ups and downs post

It is very common for musicians to discuss the direction of melodies or chord progressions, or the relationship between particular notes by using descriptive terms such as low, high, up, down, top, bottom, between, leaping upward, over, below, rising, falling, droning beneath, soaring above, ascending, descending, etc.

It only makes sense that your understanding of the guitar should be in keeping with this pitch-oriented, musical approach.

Let that be a lesson to you.  ;)

© 2014 Matthew Woodward

Why We Use “Thumb F”

“Thumb F” vs. F Barre Chord

Okay, we all agree that playing an F major chord “thumb-style” is difficult. Students ask me, “Why not use a full barre chord instead?”

Thumb FF barre My answer is YES, you can if you like. BUT, if you don’t learn this fingering you’ll be cheating yourself out of some other great chords.

Fadd9 is a very lush, beautiful sounding chord that commonly is substituted for F. You need only take off your 2nd finger. Make sure the open G note is sounding – that note is the 9th that’s being added to the chord. You can’t play this if you start with the barre chord.Fmaj7

Fmaj7 is another pretty chord that is commonly used in place of F, and which tends to make a progression sound a bit atmospheric and dreamy. To play it, simply tip your 1st finger up onto just the 2nd string. Again, you can’t play this if you start with the barre chord.Fmaj9

Fmaj9 is a combination of both the above chords, sounding even dreamier, more complex and sophisticated. Very nice!Fm

Fm can also be played as a barre chord, but if you’ve mastered playing the thumb-style F and you are playing a progression that uses Fm along with other non-barred chords, this baby comes in real handy. A little harder perhaps, because your 1st finger has to hold down three notes, but well worth the effort in the long run. This chord, just like the barre version, is movable to other fret locations.

It’s my understanding that classical guitar is the only discipline that discourages players from using their thumbs to fret notes.

I say, “Hey, it’s like having one more finger!

So there you have it.

No pain, no gain.

Let that be a lesson to you.  ;)

© 2014 Matthew Woodward

Practice, Rehearsal and Performance Are Three Different Things, Part III

PERFORMANCE

This is the main event – the “gig” at which the musician or group plays its repertoire before a live audience. Be it a campfire sing-along or a full-scale concert event, the quality of that performance will reflect the amount of time the musicians have spent practicing separately and rehearsing together.

There is nothing that compares to the experience musicians gain on stage, and when performers “click” with their audience the concert experience can be magical.

Despite hours and hours of musical preparation, performing for an audience also requires energy, stamina and above all professionalism. This means being ready for the missed cues and mistakes that always happen and knowing how to deal with them in a way that the audience (hopefully) won’t notice. As a performer, you will encounter many things beyond your control such as broken strings, equipment breakdowns,
bad connecting cables, personal illness, family and relationship problems, deaf soundpersons, drunken fans, shyster managers, insane club owners…how you react to situations is important. As the saying goes, “the show must go on”. The real “troupers” find the focus and inner strength they need to rise above whatever external issues might affect their performance.

Electric players should strive to get the best sound they can at a comfortable level, using the venue’s sound system to boost their signal. If you’re not “in the mix”, what the crowd hears will suffer. You will also annoy your bandmates, especially those who are trying to sing on pitch. 
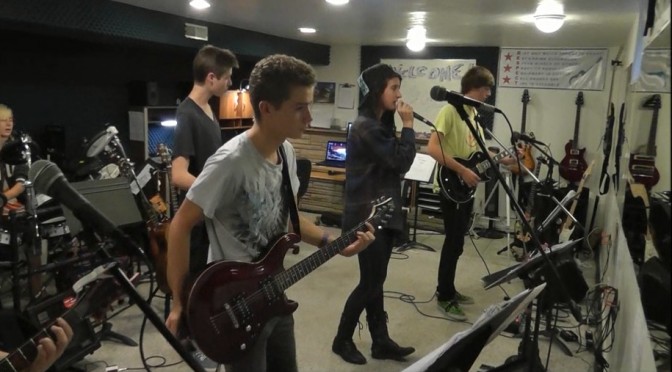
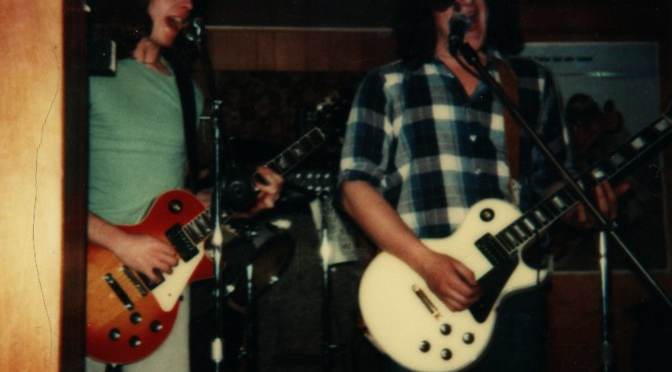
For most audiences the vocal performance is the single most important feature of any song. Your chosen stage volume should never be such that it will drown out the singer(s). One of the best compliments a musician can give to another musician is to say that he or she “has big ears”, meaning that they listen to all of what’s being played and react to the others in the group. If you can’t hear the other members of your group, you’re too loud.

Working from a set list that everyone agrees upon is very important. Try to create little “segues”, transitional musical links that connect one song to the next, to avoid dead air between your tunes. A segue can be quite elaborate, involving key changes or modulations, but can also be as simple as having your drummer immediately kick into the beat of your next song. Keep your show moving along.

Be aware of which person in the group should be the focal point of the audience at any given time. If it is their time to solo, play to them, support them, encourage them. Audiences notice these things. Follow spotlights are wonderful tools in this respect and can be used to help guide your audience to look exactly at what you want them to.

Some of the best groups of musicians that I’ve worked with recorded live shows and listened to them immediately after the performance, while everyone was winding down from the adrenaline rush and memories of what transpired were still fresh. We’d listen to what we did, evaluate our performance, giving each other credit where due and respectful, constructive criticism when requested or necessary. This always helped make our next show better.

I’ve always believed that the people on stage should be better-dressed than their audience, or at least as well as, no matter what style of music they are playing. Jeans and a t-shirt are okay for Bruce Springsteen, but he’s already made it to the top with a blue collar image.BRUCEGive some thought to your appearance and the impression you will make on the audience. Without adopting uniforms, your group might decide to wear only certain colours or patterns. For example, you can wear whatever you want, as long as it’s black and/or blue. This idea allows everyone freedom to dress as they like,  but a more unified visual results which makes the group or band look more “together” and professional. It may sound “old school”, but it’s worth saying: DRESS FOR SUCCESS.

One last thought, perhaps most important of all…don’t forget to get paid.

Let that be a lesson to you. ;)

© 2014 Matthew Woodward

Practice, Rehearsal and Performance Are Three Different Things, Part II

REHEARSAL

This is where the practice pays off and the fun begins. Here a group of musicians meet and actually play their music together. The chosen songs are played and ideally, everyone tries to make what they do as individuals contribute to an overall group sound.

Listening to one another – not only to the musical parts each person plays, but to the creative ideas and constructive suggestions they contribute – is the key to having a productive rehearsal. Rehearsals are usually best conducted at low volumes (even for death metal bands) so that players can talk to one another without having to shout over blaring amps or crashing cymbals. High volumes contribute to fatigue and irritability, and really aren’t necessary at rehearsal. You know what you sound like loud – save it for the stage.

At rehearsal players figure out how to present a song to the best of their collective abilities. They work on a song either in its entirety, or in smaller sections, to decide upon how it should be arranged. A player may need to go over their solo section a few times to hear how their ideas fit with what everyone else is doing, perhaps make a few changes. Time might be spent on honing the harmony vocals for the chorus of the song. Groups working on original compositions will often “jam” on their rough ideas for hours, following their inspirations and hoping to strike gold. At rehearsal an entire song is usually played many times all the way through. Often groups will record their rehearsals for later evaluation.

Decisions are also made upon the order in which songs are to be performed live before an audience, with careful consideration given to such aspects as keys, tempos and mood. If the group of musicians is putting on a full-scale concert production, “dress rehearsals” may also be held, at which all sound and lighting cues are worked out with their technicians in a simulation of the actual planned concert. After all this the music is (hopefully) ready for public performance.

Let that be a lesson to you. ;)

© 2014 Matthew Woodward

Practice, Rehearsal and Performance Are Three Different Things, Part III

Notes On Tuning

Although your guitar can be in tune with itself, to be in tune with the rest of the world we must have a standard reference pitch with which we can make sure that at least one of our strings is in tune. Once one string is in tune, the tuning of the others can be derived from it.

tuning fork
Tuning Fork

In the not-so-distant past folks would have to tune their guitars by ear to what they thought was right, to the nearest available piano, or to any other instrument that was considered reliable. Another method employed was to tune a string by comparing its pitch to a note produced by a tuning fork, which produces its sound when it is struck against your knee or heel and is then held by its stem against the guitar. You compare the sound of the string you wish to tune to the pitch of the tuning fork and try to match it exactly by ear.

pitchpipe
Pitch Pipe

The first tuning device I used was a pitch pipe (sort of a six-note harmonica). The six pipes play the notes E, A, D, G, B and (high) E. You blow a note on the pipe and tune the pitch of the string that matches that pipe until it sounds right, doing this for each string. Convenient, cheap, but not very accurate. If I misplaced my pitch pipe I would put a familiar recording on the turntable (perhaps a song that I knew featured an obvious A, E or D note) and tune my guitar by ear to that. Then I would walk 25 miles uphill through driving snow to get to rehearsal.

 When I first started playing in bands all the touring acts carried electronic stroboscopic tuners. Strobe tuners have been around since the 1930’s, and were primarily used by piano tuners.

Conn Strobe Tuner
Conn Strobe Tuner

Although highly accurate, they were big, heavy, expensive, and sensitive to being knocked around in the back of a van.

korg gt-6
Korg GT-6 Tuner

I was amazed when the Korg GT-6 portable guitar tuner first came out in 1979 – small, affordable and made specifically for guitarists. I ran to my local music store and bought one right away. Revolutionary!

Today, electronic battery-operated, hands-free guitar tuners are inexpensive, highly accurate, easy to use, and available at all music stores. You simply hold the microphone (built into the tuner) up close to the soundhole of an acoustic guitar, or plug an electric guitar directly into the device and then tune up by watching a meter with a needle (most accurate) or an LED display of some sort. Some tuners clip on to the headstock of your guitar and work by sensing the vibrations of the instrument. “Stomp box” foot pedal tuner designs are indispensable for electric players onstage.

As with most things today, the amount you spend determines the quality of construction materials, durability, accuracy and flexibility of the tuner. Cheap tuners tend to break easily, or will go out of calibration if dropped. Pricier “chromatic” tuners will allow you to tune to any note, not just the six notes used in “standard” tuning, and are generally worth the extra cash. There are also tuning programs available as freeware on the internet.

Although electronic tuners are amazing, you don’t want to become totally dependent on them. Almost all of the “old school” methods of tuning required a player to use their ears to listen to a reference pitch while attempting to match the tuning of their string to that reference. listen

Listening is GOOD for you, and helps train your ear to minute changes in pitch.  It’s important to know exactly what to listen for. When two notes that are slightly out of tune with each other are played together, their combined frequencies produce an effect known as “destructive interference”. We hear this as a regularly occurring drop in the volume of the two notes, referred to as “beating”. Remember that it is the combination of two almost-in-tune notes that causes this effect – both pitches must be ringing in order to hear this beating effect.destructive

The speed of the beating effect depends upon how close in frequency the notes being compared are. If the two notes played are very close in pitch, the beating will sound like a slow pulsing wave. If the notes are far apart in frequency, the beating will be rapid, producing a fast, warbling sound. Once a player can hear this, they begin to tighten or loosen a string, listening carefully to the speed of the beating until they are able to make the effect stop completely. When the two notes are perfectly in tune with each other the beating sound disappears. You are good to go!

Let that be a lesson to you.  ;)

If you liked it, please feel free to share my post with your friends.

© 2014 Matthew Woodward


Guitar Questions: Intonation

What does the term “intonation” mean?

Simply put, intonation refers to a guitar’s ability to get in tune. Setting the intonation refers to the adjustment of the strings’ lengths to compensate for their stretching when they are fretted. This adjustment is usually performed at the bridge by moving the saddle(s) backwards or forwards until the 12th fret octave harmonic precisely equals the octave  played at the 12th fret.

If the strings did not stretch when pushed down to fret notes, the intonation would be perfectly set with the bridge saddle(s) located at precisely twice the distance from the nut as the middle of the 12th fret is from the nut. Because they do stretch, the saddle(s) must be set back enough to compensate.

When setting up a guitar, intonation must be adjusted last, as any other variables such as the truss rod tension, action, or even the pickup heights can affect it. All intonation checking should always be done in playing position in order to account properly for neck flex, which affects string height and therefore string stretch.

How can I check my intonation?

Checking your intonation is easy with a quartz digital tuning meter, preferably one with a meter readout rather than one LEDs. Be sure your strings are relatively new, with at least 3/4 of their expected life left. With your guitar tuned to pitch and held in playing position, compare the note played at the 12th fret with the octave harmonic at the 12th fret. They should be the same.

If they are the same and you still have intonation problems, check the open strings and the other fretted notes. If particular frets are out and others are in, look to see if the frets are worn to the point where the string is not leaving from their centers. If so you may need a grind and polish or new frets to cure the problem. Bad scales are not uncommon on handmade or on very cheaply made instruments. If the intonation starts out bad on the first few frets and gets progressively better going up to the 12th, your guitar may have a misplaced nut. This would throw the entire scale off. You need the assistance of a competent repair person to relocate the nut.

What is involved in adjusting it?

The actual intonation consists of setting the bridge saddles so that the note played at the 12th fret is an exact octave of the open string. This is best done by a tuning meter to compare either the open string or the octave harmonic (12th fret) with the fretted octave at the same fret. Use gentle finger pressure, as any finger english or “articulation” will disturb the accuracy of the adjustment. If the note is sharp compared to the harmonic, lengthen the string. If the note is flat, shorten the string.

Electric guitars with individually adjustable bridge saddles are the easiest to set, but there are methods that can be used on acoustic guitars and other guitars without built-in adjustments, although those methods are too involved to discuss here. If you check your intonation regularly, it should rarely take more than a few minutes, provided you stick with the same action and string gauges. If you own a tuning meter I recommend that you check the intonation every time you change your strings. Even the slightest discrepancies from one set of strings to the next can make a difference. If the amount of adjustment provided by your bridge proves inadequate to intonate one or more strings, it may be necessary to have a repair person take a look. Sometimes a saddle needs to be turned around and re-slotted; sometimes the entire bridge may need to be moved. In general, however, it is a quick and easy home procedure.

One final reminder: always check the intonation with the guitar in playing position, as the flex of the neck would otherwise interfere with accuracy.

This information is borrowed from “The Novice’s Guide to Guitar Repairs” by Barry Lipman, with thanks to the author.

What’s In The Box?

Over the years I’ve enjoyed collecting guitar-related accessories such as effects stomp pedals, cables, straps, cords, capos, stands, slides…and it’s still FUN.

Years ago my onstage rig featured what was probably one of the first- ever “effects racks”, designed and built around 1980 by myself and my good friend, local electronic tech and Hammond B3 whiz Ken Hall, who was working at the back of Renaissance Music when they were on Princess Street. Ken and I were trying to come up with a way to get my pedals up off the floor so that I wasn’t kicking them around and unplugging them all the time, so we built them all into a 19″ rack about 2′ tall and then used a single pedal box at the front of the stage to control them all via relay switching.

This is all stuff that’s taken for granted nowadays, but remember, back then we were like pioneers with this stuff! If I remember correctly, my guitar connected to the front-of-stage switch box via an XLR connection, so I couldn’t kick it out. This pedal controlled the on/off status of each effect, with green and red LEDs as indicators. We also added in/out loops on each side of the box, one for my wah pedal on the right, the other for whatever odd pedal I might be trying out at time. From there a multi-core cable led to the rack, and the signal chain went : tuner (with improvised kill switch for silent tuning – tuners didn’t have that option back then) -> Ashley SC-50 Peak Limiter/Compressor -> Boss Chorus -> MXR Distortion Plus -> MXR Flanger -> Yamaha E-1010 Analog Delay -> Roland RE-201 Space Echo -> A/B amp selector -> DOD Dual 15 Band EQ -> Marshall 50W and Fender Twin. The rack sat atop its Clydesdale road case beside me onstage.

THE BOX

IMG_6017

Since those days I’ve stripped things down considerably and try to pack everything I need for a small club gig into an average sized suitcase, preferably of vintage. Many shows today have multiple bands playing and it’s important to be able to get set up and off the stage quickly, so here’s What’s In The Box:
IMG_6018You probably noticed how the suitcase is plastered with a bunch of decals. They’re so roadies know which side of the case should face up. First, a chunk of foam to protect my pedals and keep everything snug. The pedal board fits into the suitcase perfectly, with a little room left over to the side.

Guitar Effects fx Pedal Board

I try to have things packed in the order in which I will need them as I setup, so the pedal board comes out first. Here’s what lays beneath:

IMG_6023

It looks messy, but it’s not, really. AC power cables are on top.

IMG_6024IMG_6027

Notice the orange thingy on the power bar. That’s a ground lifter. Illegal, as it omits the ground plug, but sometimes that’s the only way you can get rid of buzz & hum when using multiple amps.

IMG_6025

Next up are my patch cables that connect my guitar to the pedal board, and from that to my amplifier(s). Some long ones, medium sized and short jumpers. At the bottom of the pic is a speaker cable used for connecting a Marshall head to its cabinet.

IMG_6026

Finally, a collapsible guitar stand. That’s all I need to be setup.

IMG_6028I do like to be prepared. The box also contains a really cool tool set from Canadian Tire – cost me $5.00 and has come in handy so many times, truly saving my ass in several dire situations.

IMG_6021

I’ve also got a little tin recipe box that I’ve had since about 1978. It contains fuses, 9V batteries, strings, pedal jumpers, capos, slides, etc.

IMG_6022IMG_6030The Heineken thing is just something I rigged up on a sunny day to provide shade for my tuner so I could see the damned thing. Last but not least, a little screw-top Noxzema bottle to hold the little things:

IMG_6034If you look closely, you’ll see $0.25 to use for emergency phone calls. That quarter has been with me forever. I know a payphone costs more now, but I just keep it in there for good luck.

Wait! There’s more!

Tucked into the side pouch, for making up set lists:

IMG_6029And in the pouches on the lid, set lists and extra blank paper:

IMG_6031IMG_6032

So, that’s What’s In The Box. Hope you’ve enjoyed this little tour!

Let that be a lesson to you.  ;)

© 2014 Matthew Woodward

My baby: 1976 Gibson Les Paul Custom

Lots of people ask me questions about my workhorse guitar – my friend and accomplice for 40 years – so I thought I’d post a few pics for your enjoyment.

The Les Paul Custom is the top of the line of solid-body electric Gibson guitars. Immensely playable, in addition to having a rich, dark, powerful sound it is truly a finely-crafted piece of furniture.

When I saw her hanging on the wall it was love at first sight. Purchased new in early 1977 from Sharp & Flat Music in the Frontenac Mall. I take credit for all the wear and abuse it has suffered since then.

Sporting a limited edition nitro-cellulose (now yellowed) lacquer cream finish, the body has a carved maple top and a solid mahogany back. It has multi-ply white/black binding on its top, back and headstock. The neck is maple with single-ply white binding. Tuners are gold-plated Grovers. The fretboard is ebony. Mother of pearl block inlays are on the fretboard. The headstock also has a split-diamond pearl inlay. The pickups each have separate volume and tone controls and are switchable via a 3-position toggle.

Les Paul Head Rear

Les Paul Head Rear (angled)

Les Paul One-Piece Neck & Body

This guitar has been modified somewhat over the years. Replacement parts include gold “top hat” control knobs, cream pickup surrounds and pickguard (originally black), and DiMarzio “Super Distortion” humbucking pickups. A Leo Quan “Badass” bridge and a new stop tailpiece replaced the original gold-plated hardware that had become severely corroded. The neck was completely re-fretted in the early 1990’s with top-quality jumbo fret wire.

Les Paul Body

Les Paul Body Rear

Les Paul Controls

Les Paul Bridge Les Paul Bridge 3

I hope you’ve enjoyed meeting my baby. Please feel free to share my post with others.

Let that be a lesson to you.  ;)

© 2014 Matthew Woodward